 Wine at Home
Simple Grazing Boards & Gracie Sparkling Brut
By Laina Carter of McGrail Vineyards
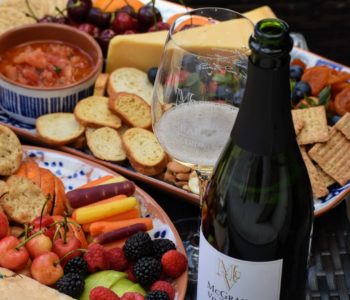
Grazing boards (a fancy name for large charcuterie boards) are one of the easiest culinary trends at the moment. Not only can anyone make them, they are gorgeous and delicious, and also all the rage on Instagram. They’re perfect in almost any setting–lounging around the pool, avoiding small talk at a party, or at home, just because you want a snack. Since I’ve been in charge of overseeing several McGrail winery events, I’ve also been the creator of nearly every cheeseboard or crudité platter our winery events have seen. That’s a lot of charcuterie for one girl to make! With this experience, I’d say I have a pretty good grasp on what it takes to make a respectable grazing board. I’ve come up with some easy-to-follow steps, which are listed below, to make your own Insta-worthy grazing board at home.
- Find a pretty plate, platter, board, or tray to use. It can be old or it can be new, but it should be pretty. Make sure it’s the right size. How many people will be enjoying your masterpiece? Make sure it’s clean. Wash it if you need to.
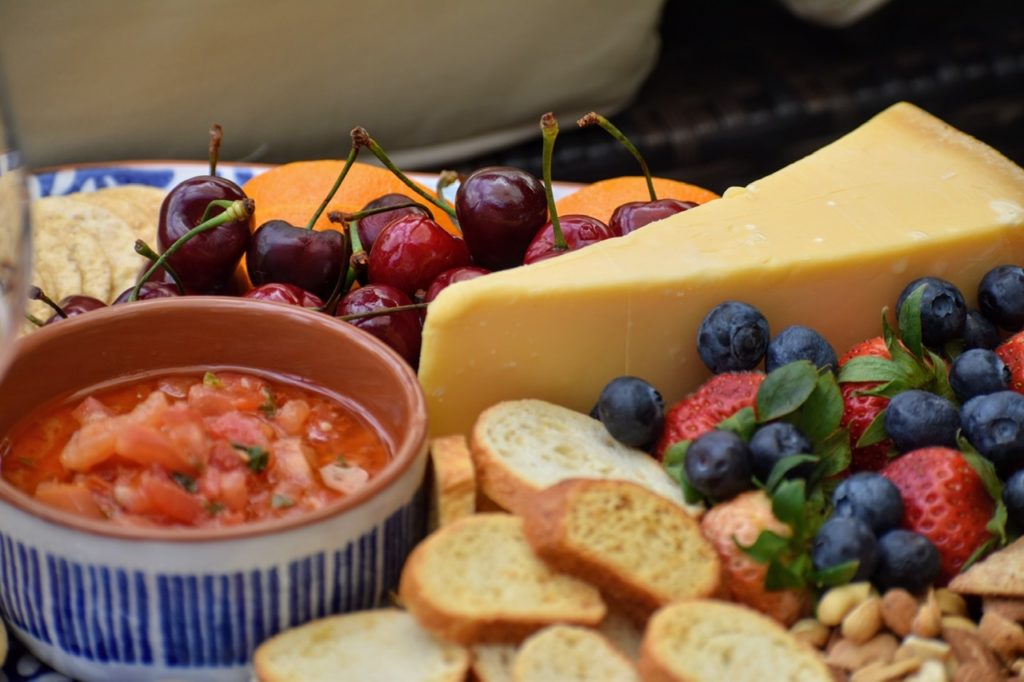
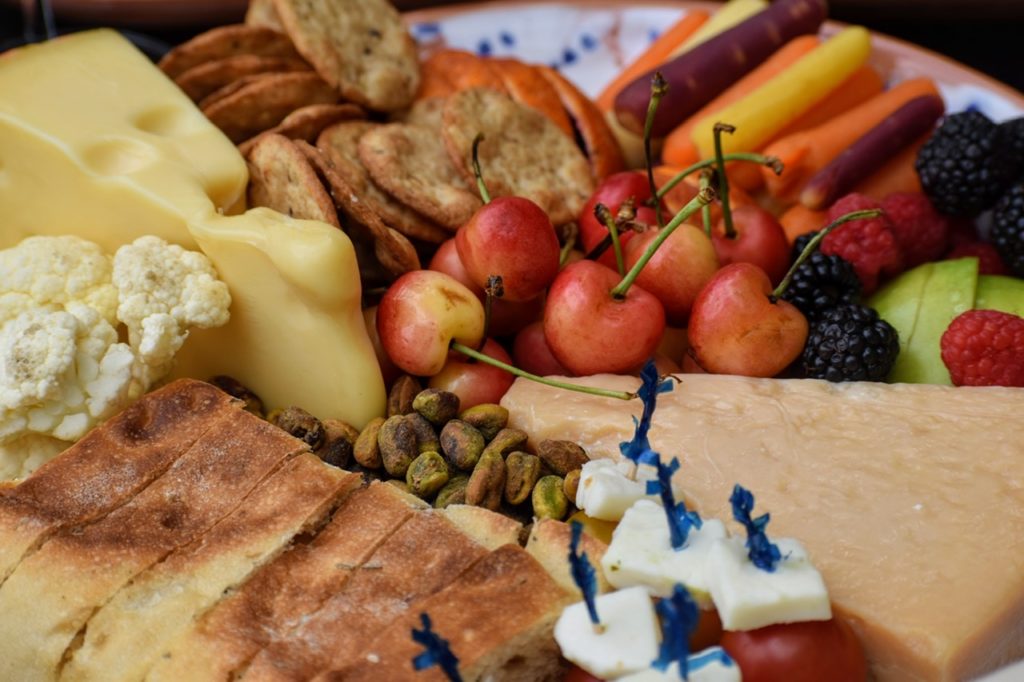
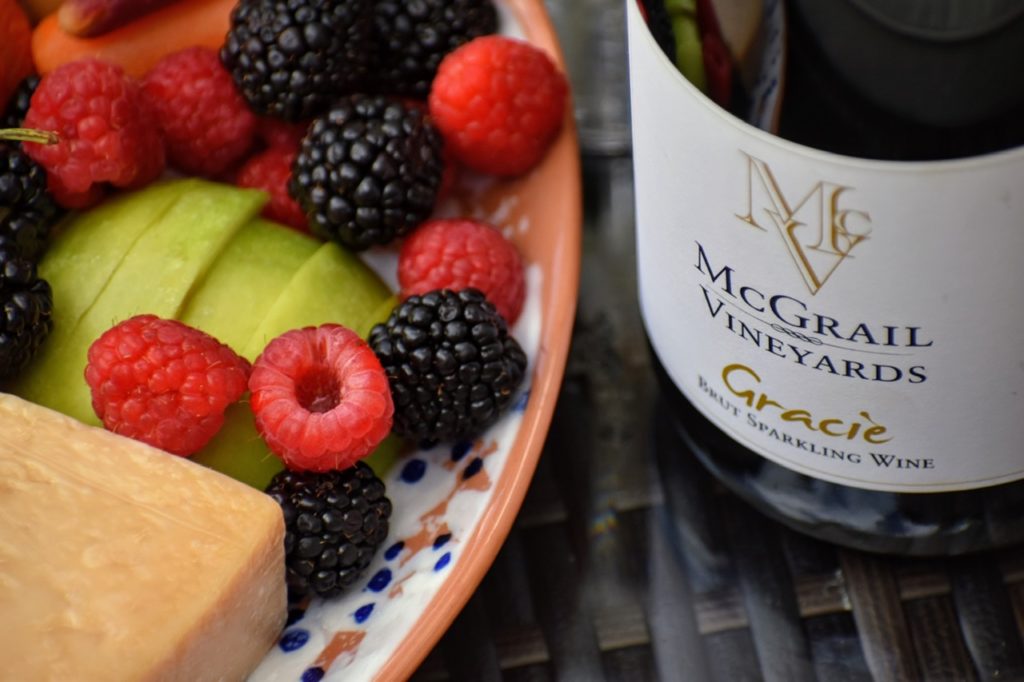
- Consider your main components–cheese, meat, fresh fruit, fresh veggies, nuts, crackers, olives, dried fruits, dips, jams, herbs, etc. Try to choose ingredients that are colorful. Rainbow carrots, mini heirloom tomatoes, sweet peppers, and various colorful fruits are some of my favorite munchies to use. When you choose ingredients that are naturally colorful, your board will be both more visually appealing and more nutritious.
- Also think about how your guests will be eating each component–with their hands, with a toothpick, etc. Will they need mini tongs to pick up each piece? Will they need somewhere to dispose of toothpicks or rinds? Will you be providing snack plates or napkins? Your guests will likely need something to cut the cheese wedges with. Make sure you have one knife available for each type of cheese that needs to be cut.
- Start by placing your larger pieces on the board first. Larger, stickier items, like cheese wedges should be placed around the outer edges of the board. This is helpful for keeping smaller snacks, like nuts or berries, from falling off the sides of your board. Dips, jams, and sauces in small bowls or saucers should also be placed on the board first, but should go in the center of the board to reduce risk of falling off. Hummus is always great to have with veggies.
- Separate similar colors and similar ingredients. Separating your colors will up the “wow” factor of your board, because it makes it appear more colorful. If you have red cherries and strawberries, put one on one side of the board and one on the opposite side of the board. Although certain components should be separated, do not just simply put a handful of each thing on the board. The placement should look organic, not careless. Some placements should be triangular, some should be long and skinny, and some should be funky.
- Make the board as full as possible. The more you have on the board, the prettier it will be! It will need to be fuller in the center and more sparse on the edges. You can use other fixings as support for smaller ingredients. Stack your blueberries as high as you can. It’s okay if they’re overflowing onto a cheese wedge.
- Get creative with your components. Each part doesn’t just have to be one ingredient. One thing I like to do is chop up apples, squeeze lemon over them, drizzle honey on top, and sprinkle a bit of blue cheese over the honey. Or, cut some mozzarella into small pieces, add a dollop of pesto or a basil leaf and a mini tomato, and stick a toothpick through it for a mini caprese salad.
- Cut up fruits or veggies that have seeds or pits or that would be cumbersome to eat whole. Bell peppers should be seeded and sliced into sticks, because just straight up eating a whole bell pepper would feel ridiculous and messy. Watermelons and oranges should be sliced, with the skins left on to make eating them easier. Don’t forget some fruits, like apples and pears should be squeezed with lemon once sliced and seeded to keep them from turning brown!
- Create patterns or artwork by manipulating certain ingredients. Salami can be folded into quarters and bunched together for a unique look. The tips of strawberries can be cut and worked to look like roses. Make it interesting to look at and to eat.
- Lastly, add some fun herbs or edible flowers as a garnish. This can contribute some serious pop to the board. A few sprigs of rosemary is a lovely and easy way to class up the board.
- Enjoy with some Gracie Sparkling Brut!
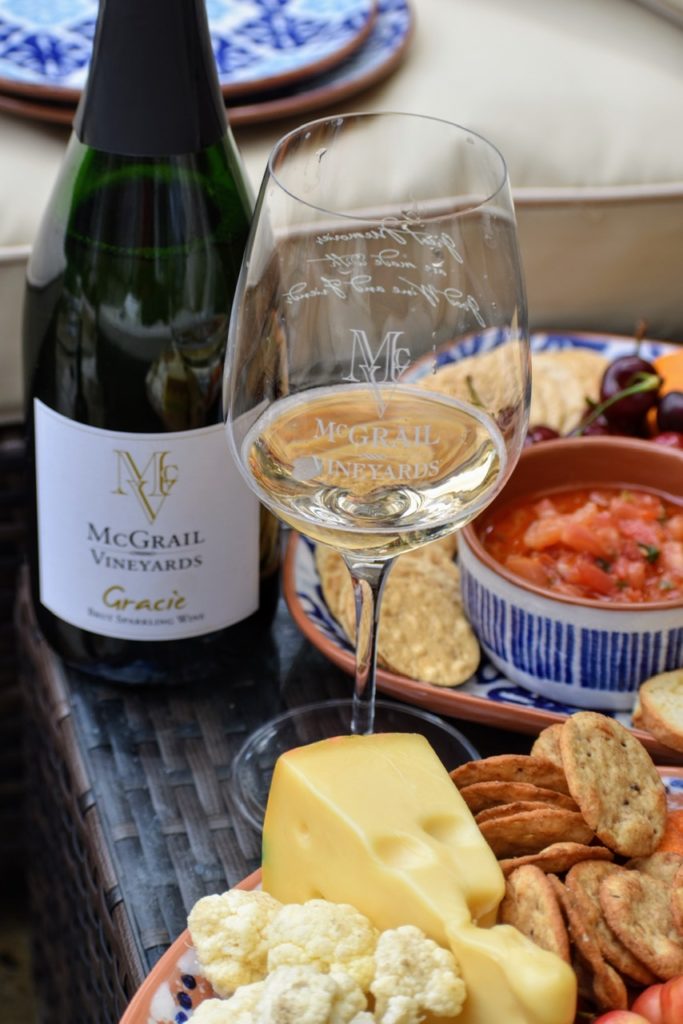
Though nearly every wine can be enjoyed with a grazing board, not every grazing board should be enjoyed with every wine. It’s a rule in the wine world that most food can be enjoyed with sparkling wine due to its versatility, which is why I have chosen to pair our Gracie Brut with an equally stunning grazing board.
Based on my experience, here are foods I recommend using on a grazing board to enjoy alongside Gracie:
- Jarlsberg cheese
- Asiago cheese
- Mozarella, tomato, and pesto bites
- Pita crackers
- Bruschetta
- Herb focaccia bread
- Balsamic basil Triscuit crackers
- Pistachios
- Almonds
- Cashews
- Blackberries
- Raspberries
- Strawberries
- Blueberries
- Honeycrisp apple
- Granny smith apple
- Dried apricots
I hope I’ve inspired you to create your own fun, summertime grazing boards at home! Please let us know if you do. We’d love to hear from you!
Cheers and enjoy!
